Car Detailing Norwich

What is Car Detailing?

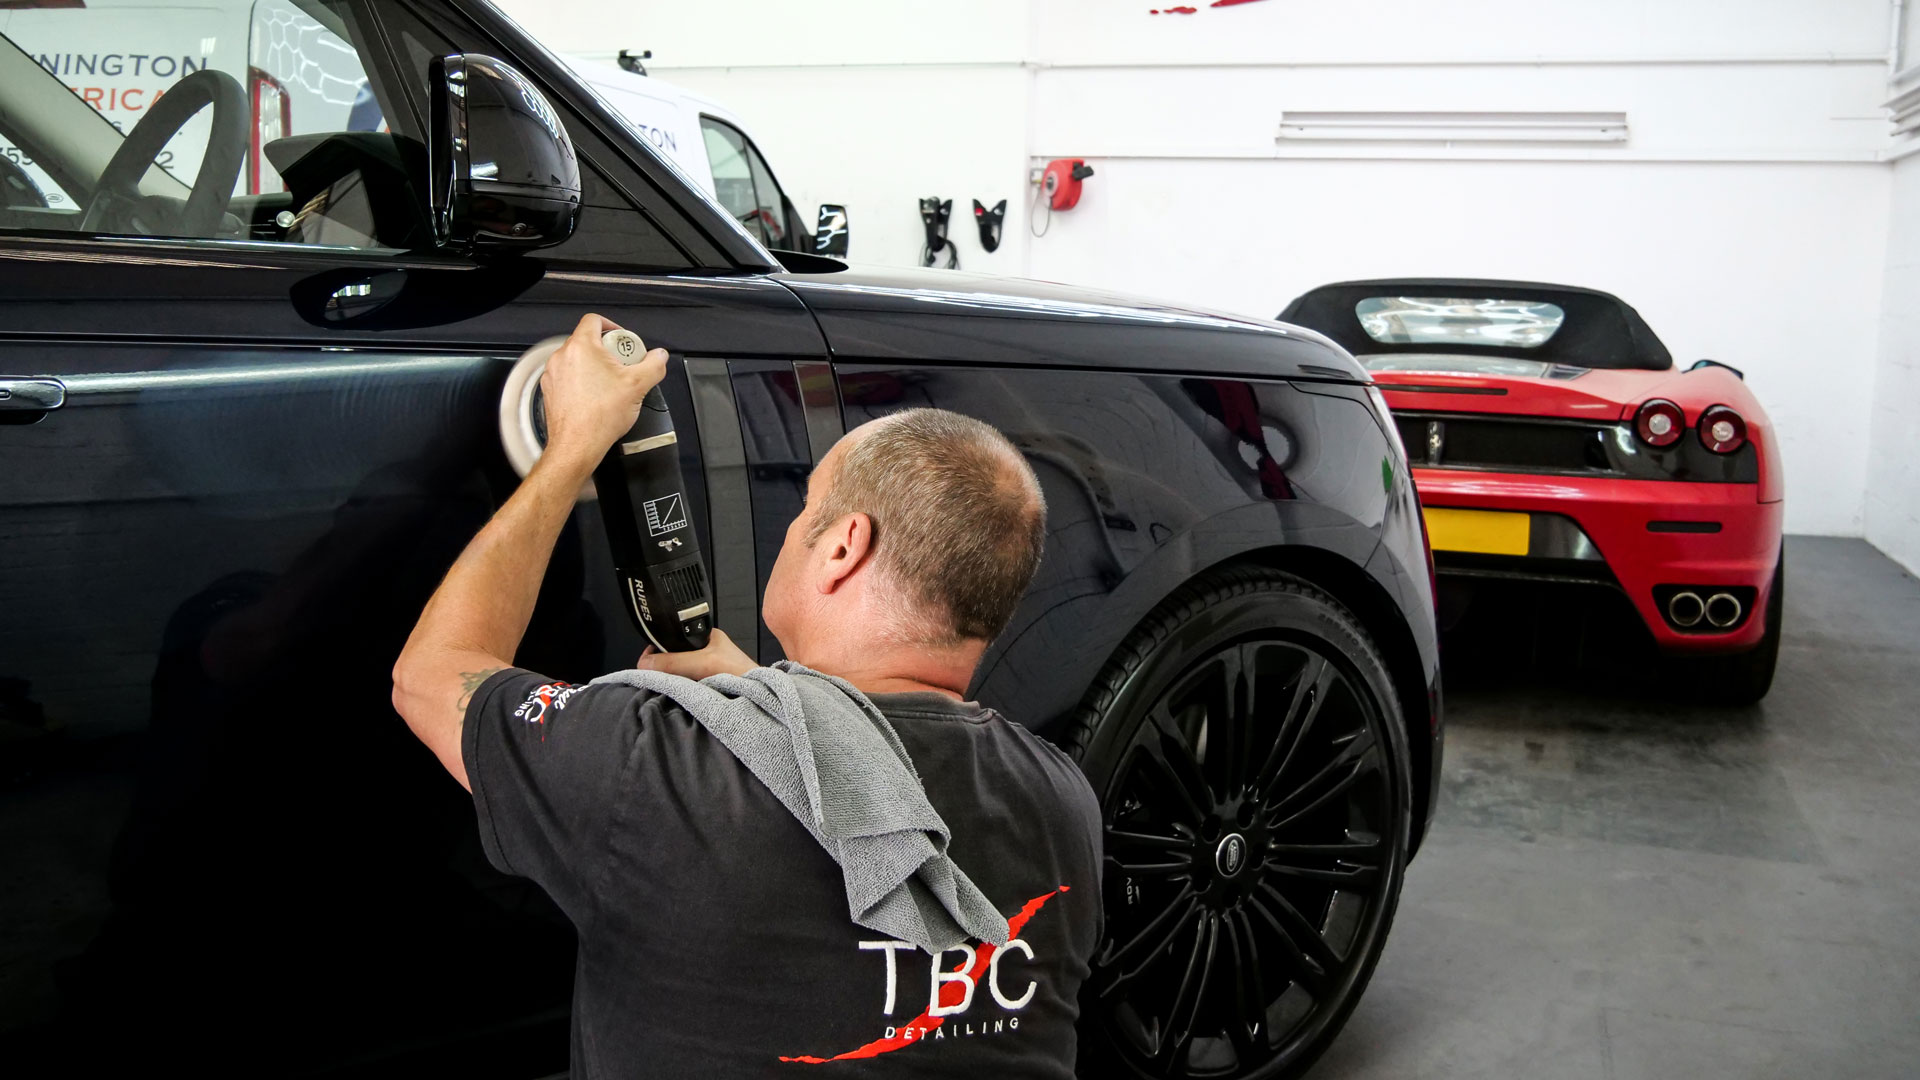
We have been asked many times what is vehicle detailing? Is it a more in depth clean of the vehicle? No, it’s way more than that. In short, detailing is about getting the absolute best look for your paintwork and other surfaces. A clean or a valet is about making sure all surfaces are clean, however they don’t really take into account embedded dirt, swirl mark issues, or the fading of paint. Of course we start off by valeting the vehicle but detailing delves much deeper than that. It’s a paint correction & enhancement service that enables you to get a re-spray like finish, without incurring the large expenses you normally would with a full paint job.

Detailing Packages

Full Exterior Only Protection Package

Initial Cleaning Stage

– Fallout remover applied
– Traffic Film Remover (TFR) & tar removal applied.
– PH neutral snow foam wash
– Contact wash
– Vehicle is dried using a blower and micro fibre edgeless drying towels

Prep, Machine Polish & Ceramic Coat

– Paintwork clay bar
– Detail mask all adjacent panels and trims
– 3 stage paintwork correction
– Full exterior ceramic coating (5 to 8 years)

– Exhaust tips cleaned & polished
– Exterior glass protection
– Wheel protection (face only)
– Brake calliper protection package
– Convertible roof protection package (if required)

*courtesy interior clean included


Extras

– Full touch up of all stone chips using the exact paint colour (mixed up by The Bodycentre)

Premium Detailing Package

Initial Cleaning Stage

– Fallout remover applied.
– Traffic Film Remover (TFR) & Tar Removal applied.
– A lime pre-wash
– PH neutral snow foam wash
– Contact wash
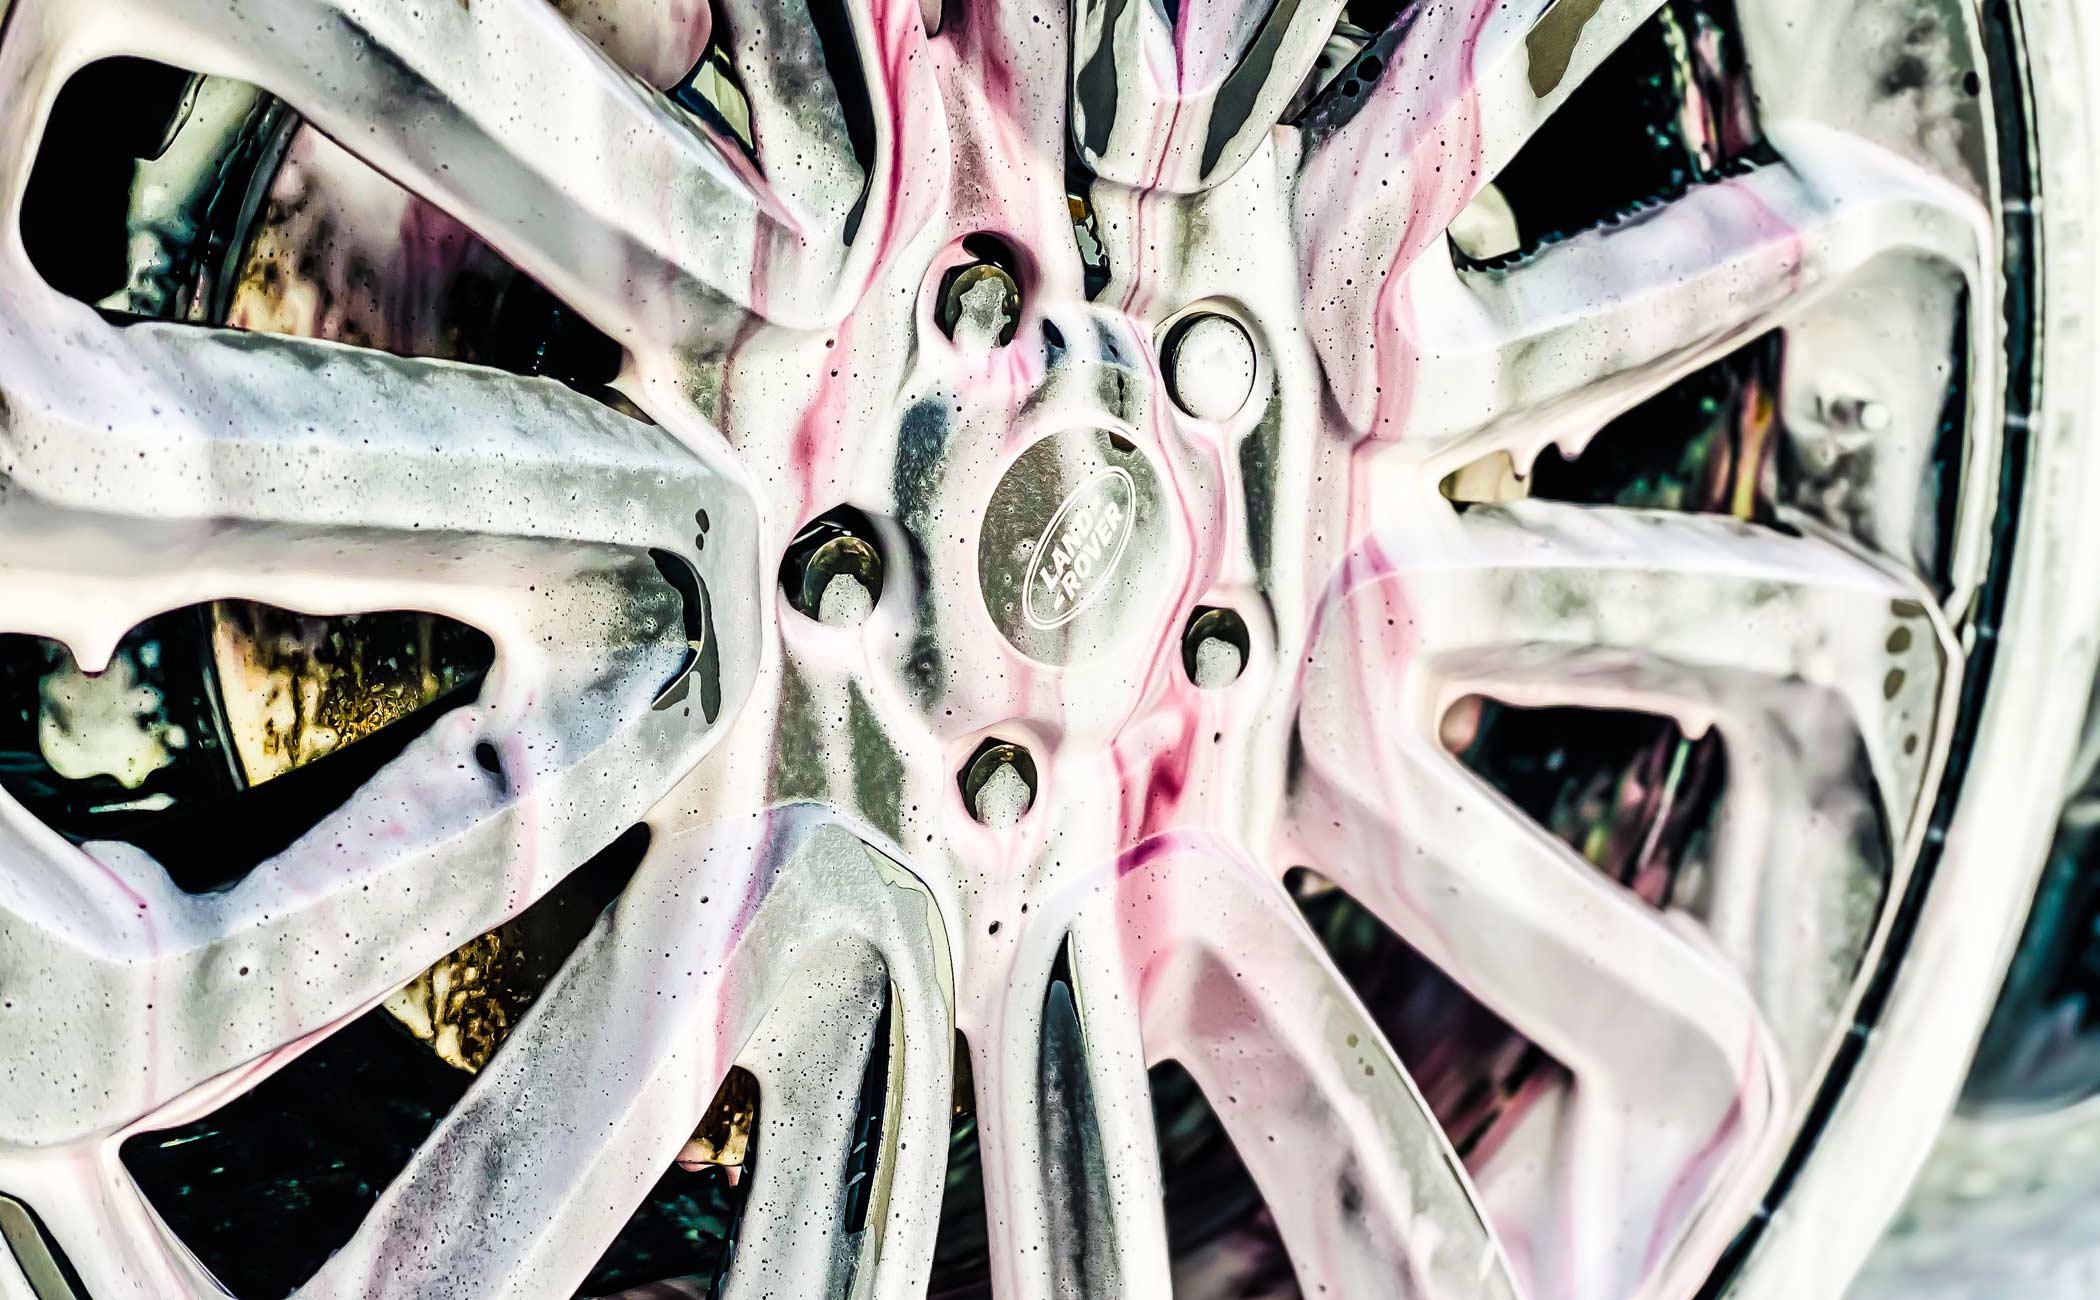
– Deep wheel & arch clean
– Engine bay steam clean
– Vehicle is dried using a blower and micro fibre edgeless drying towels

Prep, Machine Polish & Ceramic Coat

– Paintwork clay bar
– Detail mask all adjacent panels and trims

– 3 stage paintwork correction
– Full exterior ceramic coating
– Exhaust tips cleaned & polished
– Exterior glass protection
– Wheel protection package front and back (wheels removed)
– Brake calliper protection package
– Convertible roof protection package (if required)

Interior

– Premium interior valet
– Removing all dirt, dust and grime from all small crevices using detailing brushes
– Hot steam deep clean to all plastics
– Stain removal from carpets, seats and other fabrics
– Full interior protection to repel dirt, liquids and odours.

Extras

– Full touch up of all stone chips using the exact paint colour (mixed up by The Bodycentre)
– A wash guide to help you with maintaining the vehicle and ensuring the longevity of the products used on
your vehicle

New Car Protection Package

Initial Cleaning Stage

– A lime pre-wash
– PH neutral snow foam wash
– Contact Wash
– Vehicle is dried using a blower and micro fibre edgeless drying towels

Prep, Machine Polish & Ceramic Coat

– Paintwork clay bar
– Detail mask all adjacent panels and trims
– 2 stage paintwork enhancement
– Full exterior ceramic coating (5 to 8 years)
– Exterior glass protection

– Wheel protection package front and back (wheels removed)
– Brake calliper protection package
– Convertible roof protection package (if required)

Interior

– Basic interior valet
– Full interior protection applied to repel dirt, liquids and odours.

Extras

– A wash guide to help you with maintaining the vehicle and ensuring the longevity of the products used on
your vehicle.

All of these packages can be tailored to suit your needs. So if you would like a custom package, then please give us a call and we will be able to arrange this with you

what we do

Stages of Detailing

1
2
3
4
5
6
7
8
9
10
11
12
Stage 1 - Checking In
Once your vehicle arrives on site, our highly professional reception team will ensure that we have all the information we require from you, and will also answer any questions you have about the job. They will then check your vehicle in by photographing the full exterior and the mileage. This will then be followed by them giving you the keys to your courtesy vehicle, should you want to hire one.
Stage 2 - The Initial Cleaning Stage
The first step of the initial cleaning stage is to apply the citrus pre-wash Traffic Film Remover. This will remove any road grime/ tar without damaging the vehicles paintwork. It is sprayed onto the affected areas, left it for a while to do its thing, an then rinsed off using our jet wash. Following this we will then apply the Iron out, specifically focusing on the wheels & callipers, and scrub using the correct wheel brush. This product removes brake dust and iron particles from your vehicle and is suitable for paintwork, aluminium, anodised wheels and glass. It again has a PH neutral formula to protect your paintwork and leaves no residue. With regular use it can prevent paint corrosion and also contains degreasing agents to remove any additional road grime, not that there should be much left following the previous stages. Next we apply a PH neutral snow foam wash to remove any remaining dirt/ contaminants and really get into the pores of the paint. Once the snow foam has been rinsed, we then begin the final step, a contact wash, using the three bucket safety method. This ensures that no additional scratches or swirl marks are put into the paintwork from leftover contaminants in the wash mitt. We use a PH neutral car shampoo for this stage of the clean as It leaves no residue when rinsed, therefore no more streaks.
Stage 3 - Steam Cleaning
As part of our premium package, we always steam clean the engine. We first apply an engine degreaser to all areas which are appropriate, and protect any sensitive areas such as electrical components and air intakes before doing so. We then use the steam cleaner to remove as much grime as possible, wiping off any residue with a microfibre towel.
Stage 4 - Drying & Car Bar
As soon as the vehicle is back in the unit we use our BigBoi BlowR Pro Car Dryer to remove all excess water from the exterior of the vehicle, making sure all the shut gaps and trims are clear of any water. Any remaining water is then removed with a microfibre drying towel. Once the vehicle is completely dry, there is still one more step to complete before we can move on, and that step is to clay bar the entire paintwork. This will essentially be used to remove any hidden grunge and micro contaminants from your vehicle’s paint work, leaving you with a clear and bright finish. After claying the paint, the most noticeable benefit your vehicle encounters is that of slickness and smoothness. Using a clay bar definitely makes waxing easier and more effective, and is an essential step before machine polishing the paintwork. If this step wasn’t completed, and these contaminants were still on the paintwork, then the machine polisher could pick these up and cause more damage to the paintwork.
Stage 5 - Interior Valet
As part of our top detailing package we first vacuum the whole car to clear any large debris such as dirt or stones. For any smaller crevices we will use a detailing brush to remove any dust and dirt trapped there. The next stage is where we give the interior a deep clean to remove any residue, dust or stains using specific and all-purpose cleaners. These products are safe to use on all interior car surfaces including plastic, vinyl rubber, cloth, or carpet and will remove a wide variety of tough organic, and inorganic based stains. Oil, grease, food, coffee, mildew, grass, mud, sun-tan lotion and silicone-based dressings. For interiors that have amassed months or even years of dirt we will go even further and use a wet vacuum to really go deep into the fabric. Once this is complete the team will then brush all floor matts and other fabric trims to create carpet art.
Stage 6 - Applying The Interior Protection
Once the interior valet is immaculate, the team will then apply an interior protection which is a hydrophobic product that has similar properties to ceramic coating. This means that it will repel water, oils and other grime, so if there is any spillages in the vehicle then it will sit on the surface rather than soaking in, making any future cleaning very easy. Once applied the product coats the individual fibres of fabric, leaving the 'breathability' and feel of the fabric unaffected. As a result, stale air can still escape, but at the same time repelling any further odours.
Stage 7 - Paint Depth Readings & Prep For Stage 8
Now the interior is complete, the doors will be shut and not opened again until it's made ready for the customer, which is a great way of guaranteeing it will stay immaculate. Before we can move onto the paint correction we need to complete this essential stage. One of our highly qualified detailers will use a paint depth gauge and assess the level of clear coat on multiple areas of each panel to ensure they know how far they can cut if needed, to prevent burning through the clear coat. This is also a great way of seeing whether a vehicle has either had a machine polish previously, or has not had much lacquer applied during the original paint application, or even whether there has been a poor quality repaint, which we will then advise you on accordingly. Once this is complete the team will mask up all areas of the vehicle adjacent to the panels, such as headlights, weather strips, glass, and other trims, ready for the polishing stage.
Stage 8 - 2/3 Stage Paint Enhancement/ Correction
From here it's then onto the machine polishing stage which is a very important and laborious stage of the detailing process. It will remove any imperfections in the clear coat (lacquer) such as water spot marks, holograms, swirls, etching or even some light/ fine scratches. During this stage we apply fine line tape to all swage lines on the bodywork to prevent any burn throughs with the machine polisher. Our experienced detailers will take anywhere between two to four days on this stage, going through all the grades of polish. This obviously depends on whether it will be a 2 stage paint enhancement, usually for new vehicles, or a 3 stage paint correction, for old/ used vehicles. Anything beyond this point, ie damage that has also eaten into the paintwork, cannot be solved without fresh paintwork. An exception to this would be for small stone chips, which we will touch in at the end once the polishing is complete. Using our state of the art paint mixing machines over at The Bodycentre, we can mix any colour we require.
Stage 9 - Remove Wheels For Clean & Ceramic Coating
While the vehicle is being machine polished we make sure the wheels are taken off so that we can clean them thoroughly, ready for the ceramic coat to be applied. While the wheels are off we also do a deep clean of the wheel arch housings and the callipers.
Stage 10 - Post Machine Polish
Once the machine polishing is finished, we will then follow a process called edging using a blow gun & a micro fibre towel to remove any large spots of compound. An IPA solution is then applied to remove any grease/ chemicals left on the bodywork from the polishing compound. This process results in the bodywork surface being completely free of any material ready for the ceramic coating.
Stage 11 - Ceramic Coating
The next step in this extensive detailing process is the application of the exterior ceramic coat. Here at TBC Detailing we are an approved installer of, MATRIX BLACK, a ceramic liquid that comes with an 8 year protection warranty. We use this together with a product called Gtechniq Exo V4 & Crystal Serum Light, which comes with a 5 year protection warranty. Both products are great with what they provide and are equally as good when it comes to benefits you get from the coating, so the choice is up to you. For those of you who don’t know, a ceramic coating is a liquid polymer that is applied by hand to the exterior of a vehicle. The coating chemically bonds with the vehicle’s factory paint, creating a layer of protection. It repels water, offers a super high gloss finish and makes future cleaning very easy. We apply this product with a foam block which is wrapped in a suede applicator. We saturate the applicator in the ceramic liquid and apply evenly across the whole exterior of the vehicle, resulting in hydrophobic paintwork. This same product is then applied to all exterior glass, alloys and the brake callipers, offering the same protection.
Stage 12 - Collection
Now the vehicle is complete, the team will prep the car for collection. They will insert a seat cover and floor mat sheet to ensure that when we move the car to the front of the unit, the driver does not bring any more dirt or dust into the vehicle. Our team will email you over a wash guide which offers you advice and techniques on how to clean your car professionally to prevent any further damage to the paintwork and ensure the longevity of the ceramic coating.
Stage 1 - Checking In
Once your vehicle arrives on site, our highly professional reception team will ensure that we have all the information we require from you, and will also answer any questions you have about the job. They will then check your vehicle in by photographing the full exterior and the mileage. This will then be followed by them giving you the keys to your courtesy vehicle, should you want to hire one.
1
Stage 2 - The Initial Cleaning Stage
The first step of the initial cleaning stage is to apply the citrus pre-wash Traffic Film Remover. This will remove any road grime/ tar without damaging the vehicles paintwork. It is sprayed onto the affected areas, left it for a while to do its thing, an then rinsed off using our jet wash. Following this we will then apply the Iron out, specifically focusing on the wheels & callipers, and scrub using the correct wheel brush. This product removes brake dust and iron particles from your vehicle and is suitable for paintwork, aluminium, anodised wheels and glass. It again has a PH neutral formula to protect your paintwork and leaves no residue. With regular use it can prevent paint corrosion and also contains degreasing agents to remove any additional road grime, not that there should be much left following the previous stages. Next we apply a PH neutral snow foam wash to remove any remaining dirt/ contaminants and really get into the pores of the paint. Once the snow foam has been rinsed, we then begin the final step, a contact wash, using the three bucket safety method. This ensures that no additional scratches or swirl marks are put into the paintwork from leftover contaminants in the wash mitt. We use a PH neutral car shampoo for this stage of the clean as It leaves no residue when rinsed, therefore no more streaks.
2
Stage 3 - Steam Cleaning
As part of our premium package, we always steam clean the engine. We first apply an engine degreaser to all areas which are appropriate, and protect any sensitive areas such as electrical components and air intakes before doing so. We then use the steam cleaner to remove as much grime as possible, wiping off any residue with a microfibre towel.
3
Stage 4 - Drying & Car Bar
As soon as the vehicle is back in the unit we use our BigBoi BlowR Pro Car Dryer to remove all excess water from the exterior of the vehicle, making sure all the shut gaps and trims are clear of any water. Any remaining water is then removed with a microfibre drying towel. Once the vehicle is completely dry, there is still one more step to complete before we can move on, and that step is to clay bar the entire paintwork. This will essentially be used to remove any hidden grunge and micro contaminants from your vehicle’s paint work, leaving you with a clear and bright finish. After claying the paint, the most noticeable benefit your vehicle encounters is that of slickness and smoothness. Using a clay bar definitely makes waxing easier and more effective, and is an essential step before machine polishing the paintwork. If this step wasn’t completed, and these contaminants were still on the paintwork, then the machine polisher could pick these up and cause more damage to the paintwork.
4
Stage 5 - Interior Valet
As part of our top detailing package we first vacuum the whole car to clear any large debris such as dirt or stones. For any smaller crevices we will use a detailing brush to remove any dust and dirt trapped there. The next stage is where we give the interior a deep clean to remove any residue, dust or stains using specific and all-purpose cleaners. These products are safe to use on all interior car surfaces including plastic, vinyl rubber, cloth, or carpet and will remove a wide variety of tough organic, and inorganic based stains. Oil, grease, food, coffee, mildew, grass, mud, sun-tan lotion and silicone-based dressings. For interiors that have amassed months or even years of dirt we will go even further and use a wet vacuum to really go deep into the fabric. Once this is complete the team will then brush all floor matts and other fabric trims to create carpet art.
5
Stage 6 - Applying The Interior Protection
Once the interior valet is immaculate, the team will then apply an interior protection which is a hydrophobic product that has similar properties to ceramic coating. This means that it will repel water, oils and other grime, so if there is any spillages in the vehicle then it will sit on the surface rather than soaking in, making any future cleaning very easy. Once applied the product coats the individual fibres of fabric, leaving the 'breathability' and feel of the fabric unaffected. As a result, stale air can still escape, but at the same time repelling any further odours.
6
Stage 7 - Paint Depth Readings & Prep For Stage 8
Now the interior is complete, the doors will be shut and not opened again until it's made ready for the customer, which is a great way of guaranteeing it will stay immaculate. Before we can move onto the paint correction we need to complete this essential stage. One of our highly qualified detailers will use a paint depth gauge and assess the level of clear coat on multiple areas of each panel to ensure they know how far they can cut if needed, to prevent burning through the clear coat. This is also a great way of seeing whether a vehicle has either had a machine polish previously, or has not had much lacquer applied during the original paint application, or even whether there has been a poor quality repaint, which we will then advise you on accordingly. Once this is complete the team will mask up all areas of the vehicle adjacent to the panels, such as headlights, weather strips, glass, and other trims, ready for the polishing stage.
7
Stage 8 - 2/3 Stage Paint Enhancement/ Correction
From here it's then onto the machine polishing stage which is a very important and laborious stage of the detailing process. It will remove any imperfections in the clear coat (lacquer) such as water spot marks, holograms, swirls, etching or even some light/ fine scratches. During this stage we apply fine line tape to all swage lines on the bodywork to prevent any burn throughs with the machine polisher. Our experienced detailers will take anywhere between two to four days on this stage, going through all the grades of polish. This obviously depends on whether it will be a 2 stage paint enhancement, usually for new vehicles, or a 3 stage paint correction, for old/ used vehicles. Anything beyond this point, ie damage that has also eaten into the paintwork, cannot be solved without fresh paintwork. An exception to this would be for small stone chips, which we will touch in at the end once the polishing is complete. Using our state of the art paint mixing machines over at The Bodycentre, we can mix any colour we require.
8
Stage 9 - Remove Wheels For Clean & Ceramic Coating
While the vehicle is being machine polished we make sure the wheels are taken off so that we can clean them thoroughly, ready for the ceramic coat to be applied. While the wheels are off we also do a deep clean of the wheel arch housings and the callipers.
9
Stage 10 - Post Machine Polish
Once the machine polishing is finished, we will then follow a process called edging using a blow gun & a micro fibre towel to remove any large spots of compound. An IPA solution is then applied to remove any grease/ chemicals left on the bodywork from the polishing compound. This process results in the bodywork surface being completely free of any material ready for the ceramic coating.
10
Stage 11 - Ceramic Coating
The next step in this extensive detailing process is the application of the exterior ceramic coat. Here at TBC Detailing we are an approved installer of, MATRIX BLACK, a ceramic liquid that comes with an 8 year protection warranty. We use this together with a product called Gtechniq Exo V4 & Crystal Serum Light, which comes with a 5 year protection warranty. Both products are great with what they provide and are equally as good when it comes to benefits you get from the coating, so the choice is up to you. For those of you who don’t know, a ceramic coating is a liquid polymer that is applied by hand to the exterior of a vehicle. The coating chemically bonds with the vehicle’s factory paint, creating a layer of protection. It repels water, offers a super high gloss finish and makes future cleaning very easy. We apply this product with a foam block which is wrapped in a suede applicator. We saturate the applicator in the ceramic liquid and apply evenly across the whole exterior of the vehicle, resulting in hydrophobic paintwork. This same product is then applied to all exterior glass, alloys and the brake callipers, offering the same protection.
11
Stage 12 - Collection
Now the vehicle is complete, the team will prep the car for collection. They will insert a seat cover and floor mat sheet to ensure that when we move the car to the front of the unit, the driver does not bring any more dirt or dust into the vehicle. Our team will email you over a wash guide which offers you advice and techniques on how to clean your car professionally to prevent any further damage to the paintwork and ensure the longevity of the ceramic coating.
12
Land Rover wheel during detailing process

Bought a new car?

Protect your new vehicles paintwork and interior with our TBC new car ceramic coating package.